“How to Modify and Adding new Levels”
You can easily modify, extend and add new levels to the game by using Tiled, a free and open source software. Tiled is a general purpose tile map editor. It allow the creation of map layouts and specifying things such as collision areas, enemy spawn positions or power-up positions. It saves all of this data in a convenient, standardized tmx format and allow you the export of the data in json file format.
You can run Tiled on Windows, OSX or Linux. Get a copy of Tiled for your OS from here.
Open Tiled and load one of the TMX files you find in the data/map/ directory and use it as starting point for your new levels.
When you done, save the level with a new name in TMX file format, this could be useful for further editing it later, then export it as JSON file for being used by the game engine.
Be sure of exporting the JSON file in data/map/ folder.
Remember to add the JSON files of your new levels to the level files list inside the configuration file in the order you wish the levels will be played.
- Level layers overview
- How to change map size
- How to set player properties from Tiled
- How to set enemies properties from Tiled
- How to set teleports properties
A) Level layers overview - top
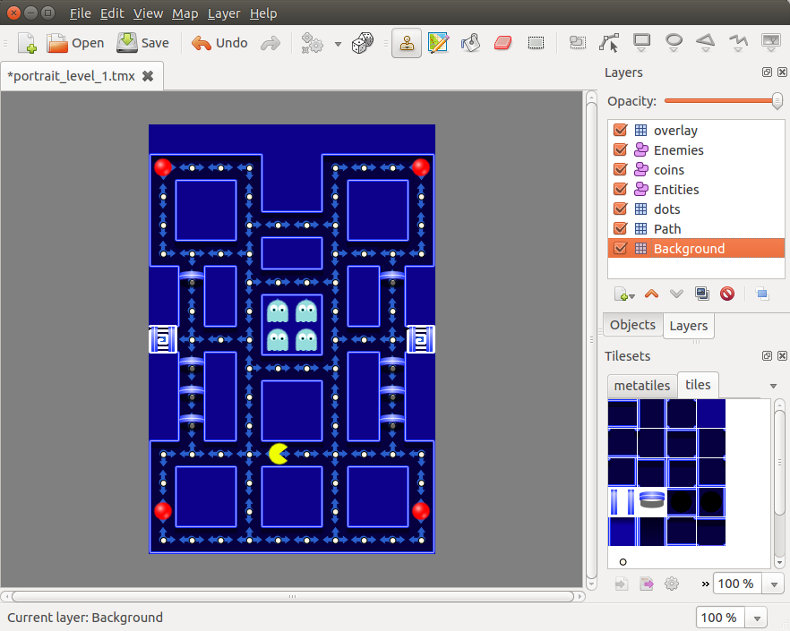
In the upper right side you have the layers and in the lower right side you find the tilesets: "metatiles" and "tiles".
You can show and hide each layer by using check boxes, this feature may be very useful during the editing of the level, anyway, keep in mind that only visible layers will be shown into the game , so, when you export the level into the JSON file remember to switch on layers you need.
 Background layer is at the bottom of the layer list, it is a tile layer and it has a merely graphic function. It's made by the tiles contained by the tileset named "tiles".
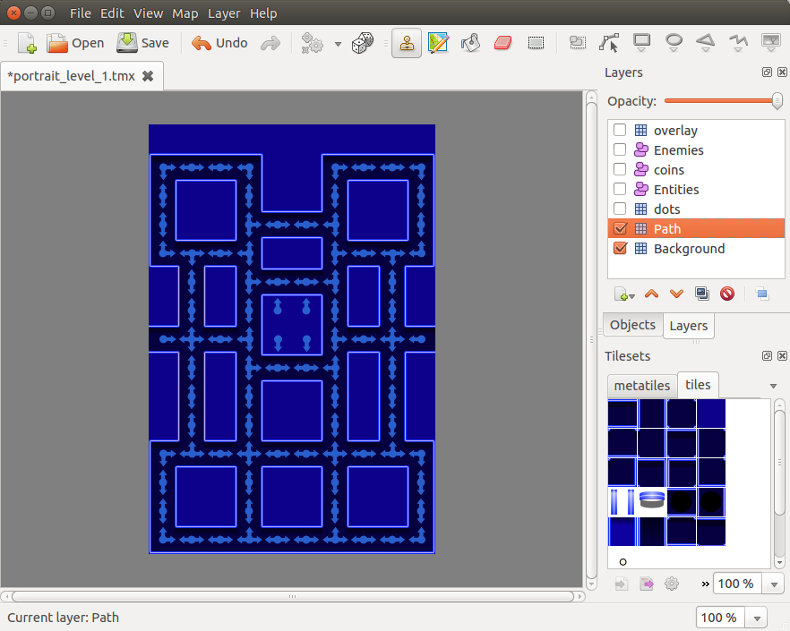
Path is another tile layer but it will be not visible during the game. It's important you keep this name for this layer.
It is made by the tiles contained in "metatiles" tileset and its function is to tell to entities (player and enemy) the direction they can take in every point of the map.
When you modify the disposition of the background of the level you must modify the Path layer in accordance to it.

dots is the tile layer holding static collectable objects the player will pick up in order to finish the game. It's important you keep this name for this layer.
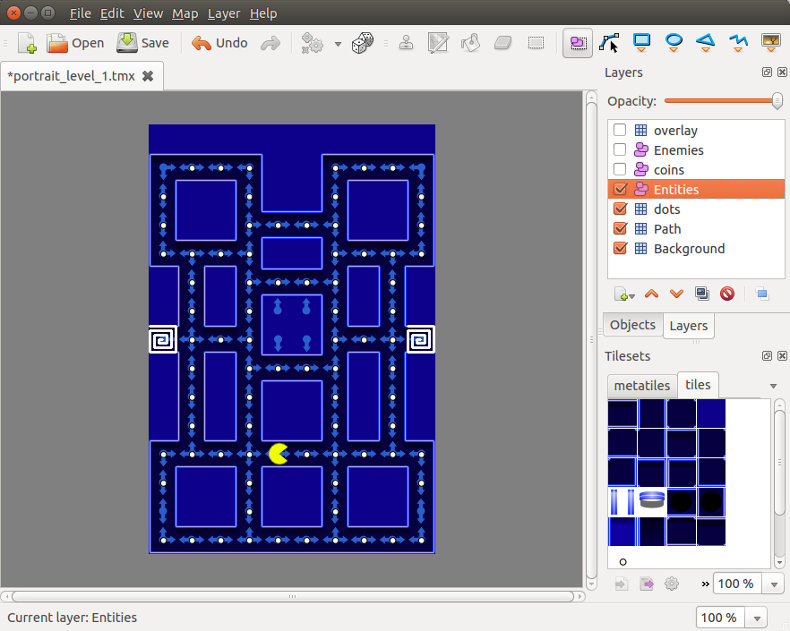
Entities is an object layer and it contains the player and teleport objects. Images shown in the editor are only placeholders with the only function of facilitate the editing process. Real graphic of the player is taken from its animation sheet (data/img/sprite/player.png) while teleport have no graphic during the game.
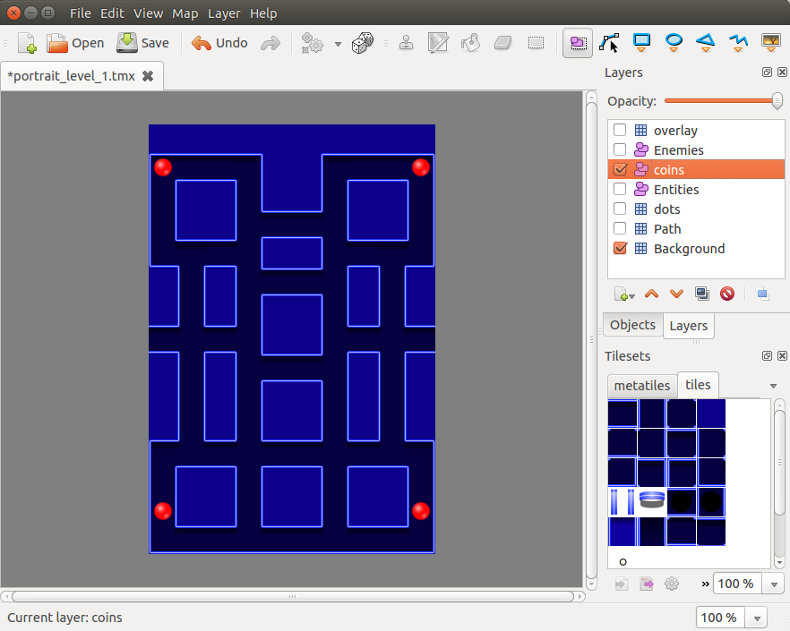
coins is an object layer and may contains animated collectable objects and the power up pills that will be collected by the player. Even in this case images shown in the editor for those objects are only for your convenience. Real graphics for collectables and pills are taken from their animation sheets (data/img/sprite/dots.png and data/img/sprite/pills.png).
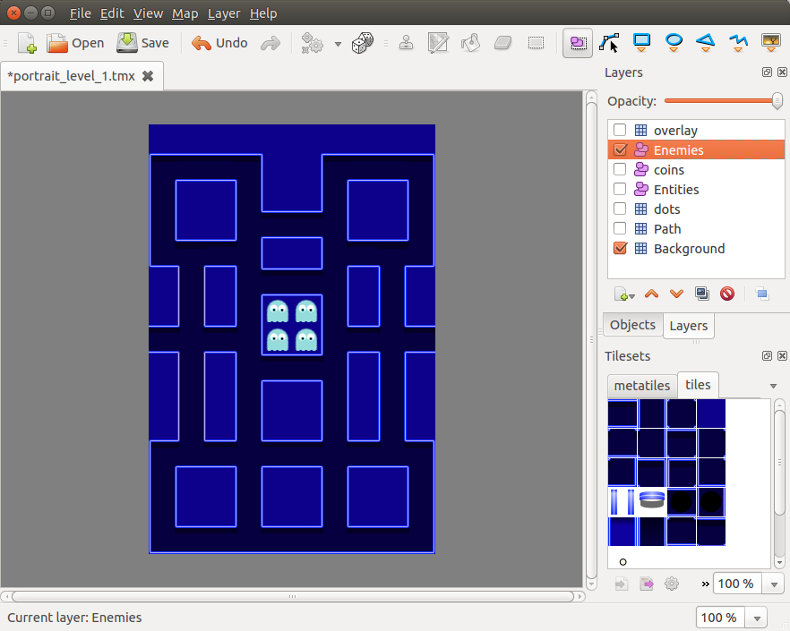
Enemies is an object layer and contains the enemies. Images shown in the editor for those entities are only for your convenience. Real graphic for each enemy is taken from its animation sheet. Animation sheet files for enemies are defined inside the configuration file.
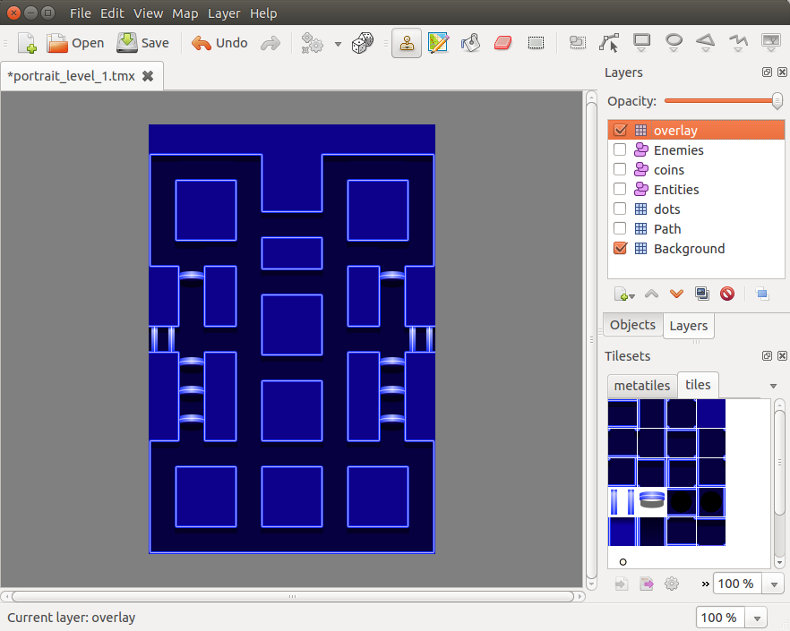
overlay layer is an optional level containing the graphic that must be shown over the player and the enemies.
B) How to change map size - top
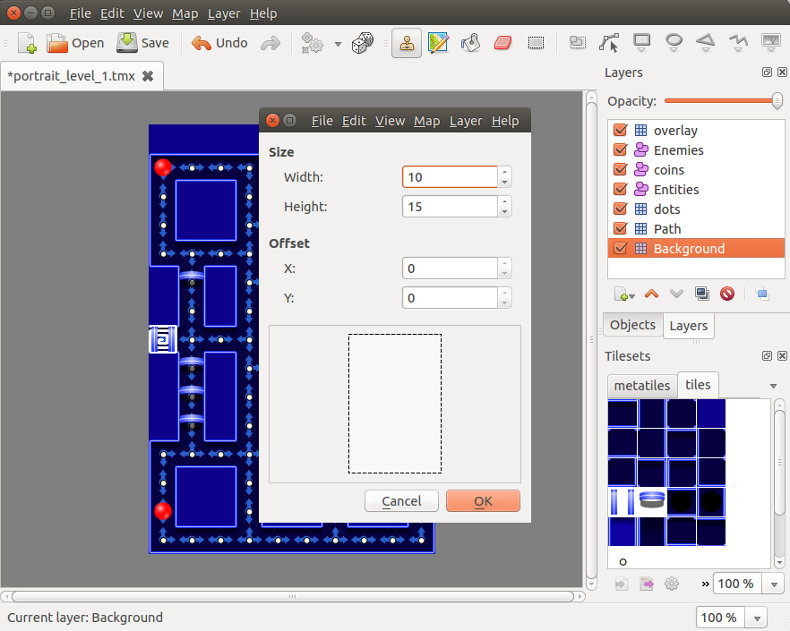 From the Map menu select Resize Map... and a dialog window will appear. From the dialog, insert the new width and height expressed in number of tiles. To figure out the size in pixel you must multiply those values by 32.
C) How to set Player properties from Tiled - top
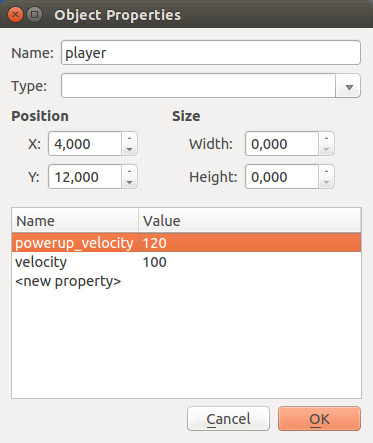
It will appears a dialog window showing the object properties.
Here, for the player object, if you wish, you can add the properties: the velocity (normal speed) and the powerup_velocity (speed on power-up time).
Those properties, if set, will override the global values set in configuration file.
This way you vary the player velocity for levels.
D) How to set Enemies properties from Tiled - top

It will appears a dialog window showing the object properties.
Type field: here you set the graphic appearance of the enemy. The value of this field is the filename of the animation sheet without the extension.
Lets see an example
Animation sheet is data/assets/images/sprite/green_enemy.png
Inside configuration file are set enemies files :
// Enemies files
var ENEMIES_FILES =[
	"yellow_enemy.png",
	"magenta_enemy.png",
	"red_enemy.png",
	"green_enemy.png"
	];
As you see green_enemy.png is listed here. If you will add new enemies, remember to add them here to the list.
Inside Tiled, into the enemy property, the Type field must be set to green_enemy to link to that one.
behavior property can be set to random or chase.
- If set to random make wandering the enemy into the labyrinth.
- If set to chase the enemy will try to chase the player.
keepAlive property, if exists and set to true, let the enemies being active even if not visible on the screen. If you have activated the radar feature you may wish the enemy appear moving even if distant from the player position, otherwise, if you don't have radar showing enemies movements outside the game screen, you can save some CPU power by setting this parameter to false or removing it at all.
velocity this property, if set, is the speed of the enemy and overrides the global value set in config file.
powerup_velocity this property, if set, is the speed of the enemy during Player powerup time and overrides the global value set in config file.
E) How to set Teleports properties - top
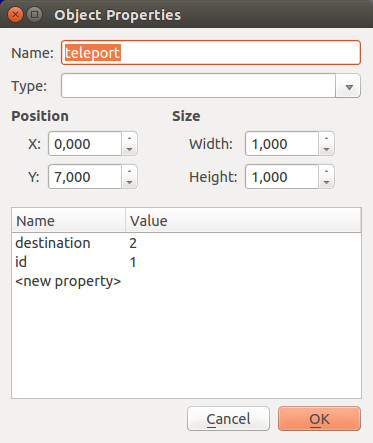
It will appears a dialog window showing the object properties.
Teleports have two properties: id that is an unique number that identify that specific teleport object and destination that is the id of the other teleport where player or enemies were teleported to.
You can link teleport 1 with teleport 2 and teleport 2 with teleport 1 for a specular behavior or you can link teleport 1 with teleort 2, teleport 2 with teleport 3 and teleport 3 with teleport 1 for a circular behavior.
Teleport objects will not produce any graphic output during the game, so, you must arrange the background graphic to indicate their presence.