“The Configuration File”
js/config.js is the configuration file. By editing config file you can change many aspect of the gameplay.
You can edit it by using your favorite text editor software like Gedit, Notepad++, Komodo or many others.
A) General configurations - top
var GAME_WIDTH	= 320;
var GAME_HEIGHT	= 480;
with those first two parameters you can set the game resolution. If you set a width greater than the height, the engine will switch in landscape mode, otherwise, if width is smaller than height, it will switch to the portrait mode.
var SCALE_INTERPOLATION_DESKTOP	= true;
var SCALE_INTERPOLATION_MOBILE	= true;
The game viewport is scaled to fit the dimension of the browser window, or screen device, in order to show the game at the best size.
Scaling operation can be performed interpolating pixels for better and smoothest graphic quality.
Interpolation is performed at the price of a little extra CPU time. Even on older computers this is not a big trouble, but, if you target low end mobile devices you have the option of switch off this feature.
The two parameters refers to interpolation when the game runs on desktop/laptop or on mobile.
var MAX_FPS = 30;You can set the maximum frame per second value to be performed by the game.
If you target desktop users, 60 fps is a good value for having the smoothest movements.
If you target mobile devices, 30 or 40 fps is a good compromise between smoothness and performances.
If you target low end devices you should try 15 or so.
var AUDIOENABLED = true;This option turns on/off the audio of the game. If you turn it off but you set visible the audio toggle button, the user can turn back it on by using such button, so, you can think about this option as a sort of default state of the audio toggle button.
var MUSICENABLED = true;This option enable the in-game background music. If you turn it off there is no way to turn it on by the user.
var ADS_ON_NEW_LEVEL = true;This option turns on/off the ad screen when player completes each level.
var ADS_ON_DEATH = true;This option turns on/off ad screen when player dies.
var BETWEEN_LEVELS_ADS_DESKTOP = "ad.html";This field contains the URL of the page shown, when games runs on a pc, if ADS_ON_NEW_LEVEL and/or ADS_ON_DEATH are set to true.
var BETWEEN_LEVELS_ADS_MOBILE = "ad.html";This field contains the URL of the page shown, when games runs on a mobile device, if ADS_ON_NEW_LEVEL and/or ADS_ON_DEATH are set to true.
For example Leadbolt offers a App Wall that fits nicely here.
var IN_GAME_ADS = true;This option turns on/off the in game banner.
Set you ad banner by editing the index.html file. Search for the line
<div id="ads" style="bottom:0; background-color:#000">HERE YOUR ADS CODE</div>
and put your banner code instead of the sentence HERE YOUR ADS CODE.
You can put banner at the top of the screen with top:0; code or at the bottom with bottom:0;code.
If you decide of activating the in game banner you should leave enough space for it when you design levels.
B) Graphical User Interface - top
var GAME_LANGUAGES = ["en","it"];This parameter consists in the list of languages the game can use for showing texts.
The game comes with English and Italian languages, so, if user's browser is set to Italian, texts are shown in Italian, for any other language configuration forces the engine to fall back on English.
Game comes with the value set to ["en","it"], if you wish to add a new language you need to add the language code to the list. For example, if you wish to add Spanish, the parameter value will become ["en","it","es"].
Then you need to make a copy of the English language file, rename it, according to the language you added and translate it.
Languages files are located in data/local/ folder, so, make a copy of data/local/en.json and rename the copy as data/local/es.json.
Loading Screen Options
var GAME_NAME_1 = "Mamma Mia";Game name first line.
var GAME_NAME_1_SIZE = 40;Font size for first line, you can change this value according to the length of the name in order to get the best pagination.
var GAME_NAME_1_COLOR = "#FFFF00";Color for first line expressed in hex value. You can get hex colors by using photo editing software or paint applications like Gimp, Photoshop, Krita, Mypaint, etc.
var GAME_NAME_2 = "Zombies!";Game name second line.
var GAME_NAME_2_SIZE = 40;Font size for second line, you can change this value according to the length of the your text in order to get the best pagination.
var GAME_NAME_2_COLOR = "#33BB00";Color for second line expressed in hex value.
var LOADING_BG_COLOR = "#000011";Background color of the loading screen expressed in hex value.
var LOADING_BAR_COLOR = "#FFFF00";Color of the progress bar expressed in hex value.
Main menu screen
There are a series of buttons in the main menu screen that you can decide if they will be visible or not.
var TOGGLE_AUDIO_BUTTON = true;Value may be true or false for enabling or disabling the button. The toggle audio button allows user to switch audio on or off.
var FULLSCREEN_BUTTON = true;Value may be true or false for enabling or disabling the button. On desktop/laptop computers this button will scale the game at the maximum screen size, maintaining the game viewport aspect ratio. On mobile devices this button will be automatically hidden.
var INFORMATION_BUTTON = true;Value may be true or false for enabling or disabling the button. This button opens an info screen where you can write information for the user. For example if you use graphic, sound, music made by other people, sometimes, is required you credit the author for his work, this page may be the right place for do so.
var HISCORE_BUTTON = true;Value may be true or false for enabling or disabling the button. This button shows the hi-score screen stored on your server. If you plan to not use that feature, remove this button.
var HOW_TO_PLAY_BUTTON = true;Value may be true or false for enabling or disabling the button. This button opens the how to play screen where the user gets instruction on how to play the game.
var MORE_GAMES_BUTTON = true;Value may be true or false for enabling or disabling the button. This button is a nice way of driving back traffic on your website for playing other games.
Save Score
var SCORE_URL = "http://www.ffx.it/games/mamma_mia_zombies/saveScore.php";Absolute URL to the script receiving score data. The script is saveScore.php and is located in the root folder where you placed the game on the server.
Remember to give write permissions (typically 777) to the folder scores/ on server.
App Stores
var IOS_RATING_URL		= "https://itunes.apple.com/us/app/mammamiazombie/id#######";
var ANDROID_RATING_URL	= "market://details?id=it.ffx.mammamiazombie";
The game is ready for be packaged as App using cocoonJs wrapper. If you do so, use this parameters for invite your user to rating your game on the Apple App Store and on Google Play.
More Games Button
var MORE_GAMES_URL = "http://ffx.it/";Url to your website used by the 'more game' button.
Select level screen
var USE_SELECT_LEVEL_SCREEN = true;When user clicks on PLAY button you can send them directly to the first level of the game or on a specific screen where the user can select which level starting from.
Game Over Screen
var SUBMIT_SCORE_BUTTON = true;Enable or disable the send score to the server button that you find in the game over screen.
Input Name Screen
var KEYBOARD_NUMBERS = false;Enable or disable number keys in virtual keyboard
C) Game settings - top
var PLAYER_VELOCITY = 120;Default speed of the player's sprite, when it's in normal play, expressed in pixel per seconds. This value may be overridden by editor settings.
var ENEMY_VELOCITY = 120;Default enemies speed, when player is in normal play, expressed in pixel per seconds. This value may be overridden by editor settings.
var PLAYER_VELOCITY_ON_POWER_UP = 180;Player's sprite velocity during power-up time. This value may be overridden by editor settings.
var ENEMY_VELOCITY_ON__POWER_UP = 60;Enemies velocity during player's power up. This value may be overwritten by editor settings. This value may be overridden by editor settings.
var DOT_POINTS = 100;Integer number. The points given by collecting a dot.
var PILL_POINTS = 200;Integer number. The points given by collecting a power-up pill.
var ENEMY_POINTS = 500;Integer number. The points given by the killing any enemies during power-up.
var HUD_POSITION = "upper";Value may be "upper" or "lower". Don't forget the quotes.
You can set the HUD (score, lives, pause button) in the upper or in the lower side of the game viewport.
var POWER_UP_DURATION = 10000;Duration in milliseconds of power-up time that is when the player eats a pill. A value of 10000 corresponds to 10 seconds
var ENDING_POWER_UP_ALERT = 2000;When power-up time is ending, the enemy can play a specific animation for warning the player of that fact, this value sets how much time before the animation starts. Time is expressed in milliseconds.
var POWER_UP_KILLS_ENEMIES = trueValue may be true or false. Sets the ability of killing enemies on power up time.
var ON_DEAD_ENEMY_ACTION = "respawn";Value may be "respawn" or "remove". Don't forget the quotes.
This sets what happen when an enemy dies: it can respawn on its original position or remove itself from the level.
var ENEMY_RESPAWN_TIME = 6000;The time the enemy must waits before starting again if respawn on dead. It's the time expressed in milliseconds.
var PLAYER_USES_TELEPORT = trueTeleports are special objects you can put on the map in order to move instantly the player or enemies from one point to another.
This parameter allows or disallows player from using teleport objects.
var ENEMIES_USE_TELEPORT = falseThis parameter allows or disallows enemies from using teleport objects.
D) Animations - top
Sprites animations are stored into animation sheets.
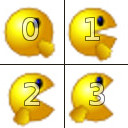
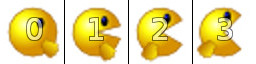
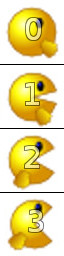
An animation sheet is an image (a png image in this case) containing all the animation frames. Frames can be arranged as a grid, as or horizontal sequence or a vertical stack.
| Grid sheet | Horizontal sequence sheet | Vertical stack Sheet | ||
 |
 |
 |
You can use the arrangement you prefer because the game engine will recognize it.
First frame is frame 0 and it's the upper left frame.
Inside configuration file you tell to the engine how to use the frames by defining lists of them, for example [0,1,2,3,2,1]. When you need, for example for a static character doing nothing, you can set single frame animations.
Player animations
var PLAYER_ANIMATION_NORMAL_UP_STAND		= [7];
var PLAYER_ANIMATION_NORMAL_DOWN_STAND		= [1];
var PLAYER_ANIMATION_NORMAL_RIGHT_STAND		= [4];
var PLAYER_ANIMATION_NORMAL_LEFT_STAND		= [10];
Those animations are used when player stuck on a wall, one animation for direction.
var PLAYER_ANIMATION_NORMAL_UP_WALK		= [6,6,7,7,8,8,7,7];
var PLAYER_ANIMATION_NORMAL_DOWN_WALK		= [0,0,1,1,2,2,1,1];
var PLAYER_ANIMATION_NORMAL_RIGHT_WALK		= [3,3,4,4,5,5,4,4];
var PLAYER_ANIMATION_NORMAL_LEFT_WALK		= [9,9,10,10,11,11,10,10];
Those animations are used on player when is in normal mode and it's walking, one animation for direction.
var PLAYER_ANIMATION_POWER_UP_UP_STAND		= [19];
var PLAYER_ANIMATION_POWER_UP_DOWN_STAND	= [13];
var PLAYER_ANIMATION_POWER_UP_RIGHT_STAND	= [16];
var PLAYER_ANIMATION_POWER_UP_LEFT_STAND	= [22];
Those animations are used on player when is in power-up mode and stuck on a wall, one animation for direction. If you wish maintain the same player appearance as in normal mode, set the same values of the normal ones.
PLAYER_ANIMATION_POWER_UP_UP_WALK		= [18,18,19,19,20,20,19,19];
var PLAYER_ANIMATION_POWER_UP_DOWN_WALK		= [12,12,13,13,14,14,13,13];
var PLAYER_ANIMATION_POWER_UP_RIGHT_WALK	= [15,15,16,16,17,17,16,16];
var PLAYER_ANIMATION_POWER_UP_LEFT_WALK		= [21,21,22,22,23,23,22,22];
Those animations are used on player when is in power-up mode and it's walking, one animation for direction. If you wish maintain the same player appearance as in normal mode, set the same values of the normal ones.
var PLAYER_ANIMATION_VICTORY = [1,1,4,4,7,7,10,10,1,1,4,4,7,7,10,10,1,1,4,4,7,7,10,10];This animation is performed on player when a level is completed.
var PLAYER_ANIMATION_DYING = [24,24,25,25,26,26,25,25,24,24,25,25,26,26,25,25,24,24,25,25,26,26,25,25];This animation is performed when the player dies. Please keep a long trail with the last frame, otherwise, you will see this animation looping.
Enemies animations
var ENEMY_ANIMATION_NORMAL_UP_WALK		= [6,6,7,7,8,8,7,7];
var ENEMY_ANIMATION_NORMAL_DOWN_WALK		= [0,0,1,1,2,2,1,1];
var ENEMY_ANIMATION_NORMAL_RIGHT_WALK		= [3,3,4,4,5,5,4,4];
var ENEMY_ANIMATION_NORMAL_LEFT_WALK		= [9,9,10,10,11,11,10,10];
Those animations are used on enemies when player is in normal mode, one animation for direction.
var ENEMY_ANIMATION_ATTACK_UP_WALK		= [6,6,7,7,8,8,7,7];
var ENEMY_ANIMATION_ATTACK_DOWN_WALK		= [0,0,1,1,2,2,1,1];
var ENEMY_ANIMATION_ATTACK_RIGHT_WALK		= [3,3,4,4,5,5,4,4];
var ENEMY_ANIMATION_ATTACK_LEFT_WALK		= [9,9,10,10,11,11,10,10];
Those animations are used on enemies when player is in normal mode and the enemy is chasing the player, one animation for direction.
var ENEMY_ANIMATION_BITE_UP_WALK		= [6,6,7,7,8,8,7,7];
var ENEMY_ANIMATION_BITE_DOWN_WALK		= [0,0,1,1,2,2,1,1];
var ENEMY_ANIMATION_BITE_RIGHT_WALK		= [3,3,4,4,5,5,4,4];
var ENEMY_ANIMATION_BITE_LEFT_WALK		= [9,9,10,10,11,11,10,10];
Those animations are used on enemies when player is in normal mode and the enemy captures the player, one animation for direction.
var ENEMY_ANIMATION_SCARED_UP_WALK		= [18,18,19,19,20,20,19,19];
var ENEMY_ANIMATION_SCARED_DOWN_WALK		= [12,12,13,13,14,14,13,13];
var ENEMY_ANIMATION_SCARED_RIGHT_WALK		= [15,15,16,16,17,17,16,16];
var ENEMY_ANIMATION_SCARED_LEFT_WALK		= [21,21,22,22,23,23,22,22];
Those animations are used on enemies when player is in power-up, one animation for direction.
var ENEMY_ANIMATION_ENDING_UP_WALK		= [6,6,19,19,8,8,19,19];
var ENEMY_ANIMATION_ENDING_DOWN_WALK		= [0,0,13,13,2,2,13,13];
var ENEMY_ANIMATION_ENDING_RIGHT_WALK		= [3,3,16,16,5,5,16,16];
var ENEMY_ANIMATION_ENDING_LEFT_WALK		= [9,9,22,22,11,11,22,22];
Those animations are used on enemies when player is in power-up and the power-up time is near ending, one animation for direction.
var ENEMY_ANIMATION_DYING = [24,24,24,24,24,24,24,24,24,25,25,25,25,26,26,26,26,27,27,27,27,28,28,28,28,28,28,29,29,29,29,29,29];This animation is used when enemy dies.
var ENEMY_ANIMATION_RESPAWN = [30,30,31,31,32,32,33,33,34,34,35,35];This animation is used when enemy respawn.
Coins animations
var DOT_ANIMATION_LOOP = [9];This animation is for the dots the player have to pick up in order to complete the level.
var DOT_ANIMATION_PICKUP = [6,7,8,7,6];;This animation is performed by a dot when it's collected by the player. If you don't needs this animation you can keep this list empty []
Axe animation
var PILL_ANIMATION_LOOP = [0];This animation is for the power-up item the player can eat.
var PILL_ANIMATION_PICKUP = [];This animation is performed by a powerup item when it's eaten by the player. If you don't needs this animation you can keep this list empty []
E) files - top
Levels Files List
var LEVELS_FILES =[
	"level_1.json",
	"level_2.json",
	"level_3.json"
	];
The value of this parameter is the list of the level files. When all the levels are completed then the sequence starts again from the first but the levels counter will continue increasing during the game. For example, if you sets a total of 4 levels, when the player compete the fourth level, it will be loaded the level one as the following level but it will be shown as level five.
You can design your own levels by loading one of the provided tmx file, extending it and saving it with a new name by using Tiled, a free and open source software. Tiled is a general purpose tile map editor. It allow the creation of map layouts and specifying things such as collision areas, enemy spawn positions or power-up positions. It saves all of this data in a convenient, standardized tmx format and allow you the export of the data in json file format.
You can run Tiled on Windows, OSX or Linux. Get a copy of Tiled for your OS from here.
Enemies Files List
var ENEMIES_FILES =[
	"enemy.png"
	];
This parameter is the list of animation sheets for the enemies sprites. You can add as many enemy types as you like.